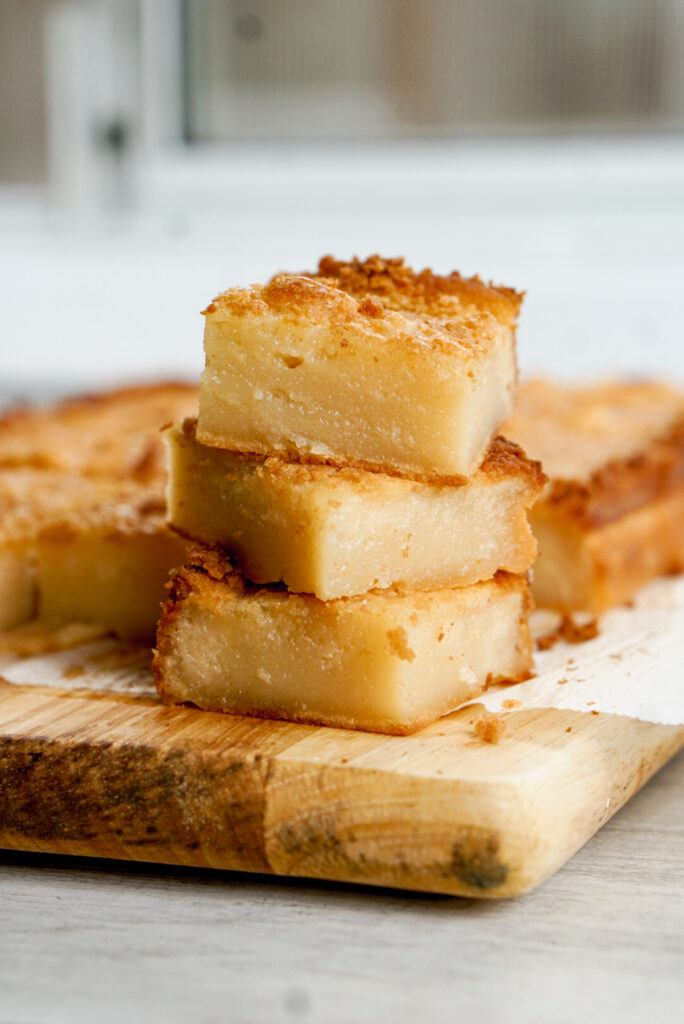
Classic Hawaii Butter Mochi Recipe
Butter mochi is a mochi cake from Hawaii with origins in Filipino bibingka and Japanese mochi confections. It’s super easy to make and perfect for baking beginners. There are many different variations out there, but this plain recipe is a classic. Add optional shredded coconut on top for a little crunch. Disclaimer: This post contains affiliate links.
What is Butter Mochi?
Butter mochi is a well known local food in Hawai’i that is, at its core, a mochi snack cake.
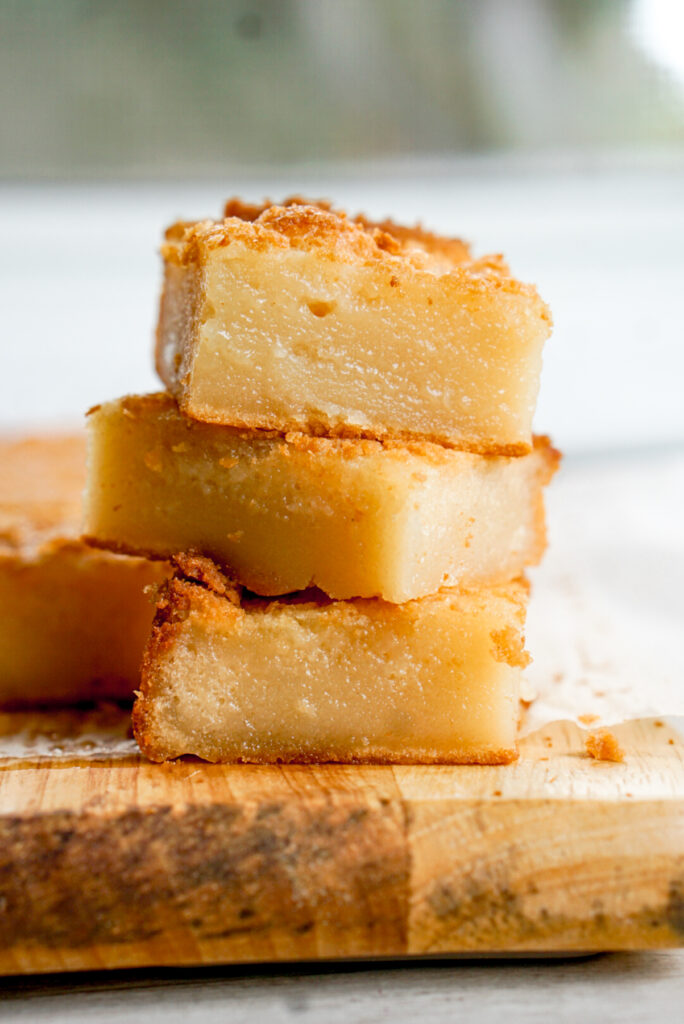
Made from mochiko, a glutinous rice flour made from mochi rice, this cake is baked in a 9×13″ pan and cut into rectangles. The other ingredients include typical cake components, such as eggs, butter, and baking powder. My recipe also uses coconut milk and evaporated milk, which is hallmark for recipes from Hawai’i. It’s chewy, dense, bouncy, and the perfect flavor balance of sweet and salty.
Authentic Butter Mochi Recipe? Is Butter Mochi Japanese?
Butter mochi has become super popular on the internet the past few years, and I’ve noticed some people requesting an “authentic” butter mochi recipe. Honestly, it’s kind of hard to say what makes a butter mochi recipe authentic. Nobody knows if the original recipe came from Japanese or Filipino immigrants to Hawaii, or both! Butter mochi has similarities to the Filipino dish bibingka, although it quite obviously uses a Japanese ingredient: mochiko. And you never hear anyone asking for an “authentic” brownie recipe do you? Or “authentic” cookie?
So what would make a butter mochi recipe authentic?
The recipe I’m sharing here is just one of many I’ve tried over the years from the Japanese American community. When I look in my catalog of recipes from family, friends, relatives, and old church cookbooks written by Japanese immigrants (many of which moved to Hawai’i before heading mainland), there are literally dozens of slightly different butter mochi versions. Depending on the ratio of different ingredients, you can make your butter mochi texture more cakey and airy, or more dense and chewy. It’s completely up to your preference, and none is more authentic than the other (as they seemingly all came from Hawai’i locals). What they generally have in common is that they use mochiko and typical cake ingredients (e.g. eggs, milk, butter). Many use canned ingredients such as coconut milk, evaporated milk, and condensed milk, which is very common in Hawai’i. All of them are very easy to make (just mix everything together and bake). They aren’t fussy or fiddly, and they’re definitely meant to share.
How to Make Butter Mochi
To make butter mochi, simply mix your dry ingredients (mochiko, sugar, salt, baking powder) with your wet ingredients (coconut milk, evaporated milk, eggs, melted butter). Pour into a greased 9×13″ pan and bake at 350 degrees F for about an hour. That’s it!
Please note that I’ve had different baking times depending on what baking pan I use. In a Pyrex or other glass dish, I find this definitely takes an hour to bake. In a metal baking pan, you can start checking for doneness by sticking a toothpick down the middle at around 45 minutes.
How to Store Butter Mochi/Can You Freeze Butter Mochi?
Leftover butter mochi can be stored in an airtight container at room temperature for a few days.
And yes, you can freeze butter mochi! My friend Katie, whose mom is from Hawai’i, taught me to wrap and freeze individual pieces of butter mochi. You can let a piece defrost at room temperature before eating, or you can zap it in the microwave to heat it up.

Other FAQ About Ingredient Substitutions
Can I Use Glutinous Rice Flour or Other Rice Flours Instead of Mochiko?
Unfortunately, no. Even rice flours made from the exact same rice can have vastly differing end textures (for example: mochiko vs. shiratamako). Although mochiko is a type of glutinous rice flour, you cannot substitute other glutinous rice flours for mochiko. Or, I guess you could, but you would wind up with a different texture than what you may be expecting. I recommend Koda Farms Blue Star mochiko or the Shirakiku brand. You can find mochiko at any Japanese grocery store and even many mainstream American markets in the international aisle. If all else fails, you can find mochiko on Amazon, although it usually is much more expensive there.
Can I Use Other Milks Instead of Evaporated Milk?
Yes, you can substitute other types of milk, including whole milk or other plant based milks, for the coconut milk or evaporated milk. Just know that different milks contain differing amounts of fat, which will affect the flavor of your butter mochi. I highly recommend just keeping some coconut milk and evaporated milk in your pantry, since they’re shelf stable and last a long time. The flavor with these two milks combined make this butter mochi my favorite!
But you can also check out my everyday butter mochi recipe for a similar recipe but without the canned milks.
Is Butter Mochi Gluten Free? Is Butter Mochi Vegan?
Yes, butter mochi is gluten free! It’s made with mochiko, which is a Japanese rice flour and contains no gluten.
Most butter mochi recipes are NOT vegan, however. They usually use dairy and eggs. At this time, I do not have any recommended substitutions to make vegan butter mochi, but I’m sure there are other food blogs out there that have one!
Can I Decrease the Sugar?
Yes, you can use as little sugar as you want or substitute a different kind of sugar. I recommend trying this recipe as is first so you get a sense of how sweet you like it.
Should I Make Butter Mochi From Scratch or A Box Mix?
A few years ago, Trader Joe’s came out with a box mix for mochi cake, which people went wild for. Prior to Trader Joe’s, there were other Hawaiian brands of butter mochi mixes as well. But if you see how easy it is to make butter mochi from scratch, you won’t bother with the mixes. The only step it saves you is mixing the sugar and baking powder together with your mochiko.
AND if you take a look at my blog post comparing Trader Joe’s box mix with my recipe from scratch, you’ll see there’s a big difference. From scratch is way better!
Butter Mochi With Shredded Coconut Topping
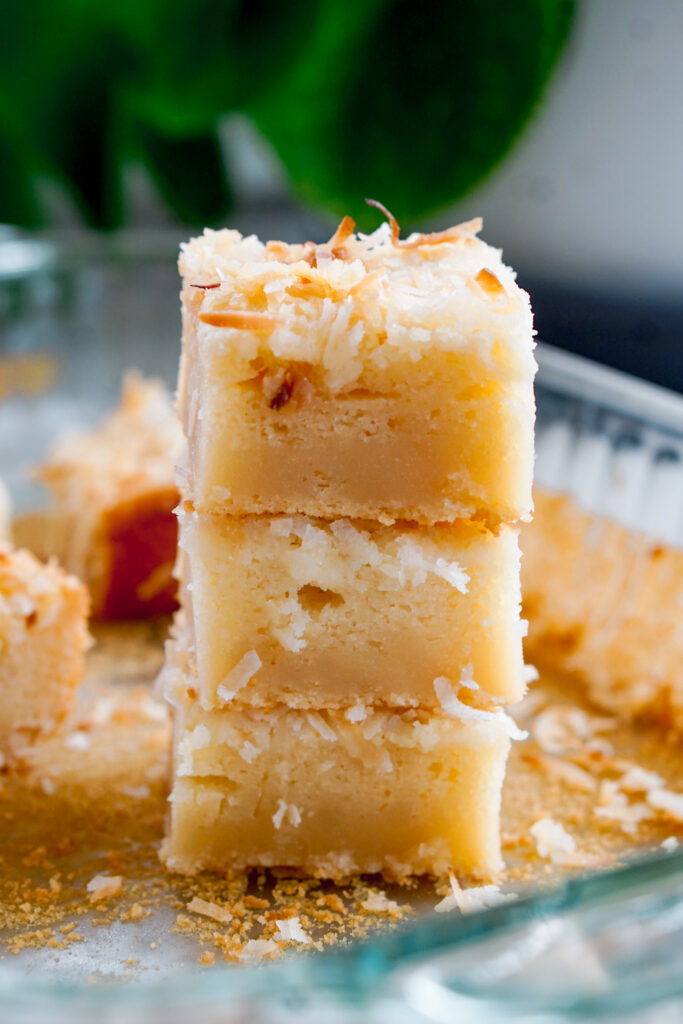
This may be a controversial addition to my recipe: shredded coconut. I LOVE shredded coconut on top for a little crunch. Jeremy HATES it. Other friends from Hawaii have been split – they either love or hate it.
But good news for everyone: shredded coconut is totally optional. If you want the shredded coconut, simply sprinkle on top of your batter before putting it in the oven. And if you don’t want it, then don’t.
By the way, a hack for you coconut lovers – KEEP YOUR COCONUT IN THE FREEZER! Seriously, just stash that bag in an airtight container in the freezer. When you need it for your butter mochi (or other desserts), you can take it straight from the freezer and onto your mochi! No defrosting needed. Now that’s a pro tip if I ever saw one.
More Butter Mochi Variations
If you love butter mochi and want to expand your butter mochi recipe repertoire (whew, what a tongue twister), check these out!
- Pumpkin Butter Mochi
- Black Sesame Butter Mochi
- Chocolate Butter Mochi
- Matcha Butter Mochi
- Ube Butter Mochi
Local Hawaii Butter Mochi
Ingredients
- 1 16 oz box mochiko
- 2 cups sugar
- 1.5 tsp salt
- 1 tbsp baking powder
- 1 14 oz can coconut milk
- 1 12 oz can evaporated milk
- 1 tsp vanilla extract, optional
- 2 eggs
- 1 stick unsalted butter, melted (1/2 cup)
- 1/2 cup shredded coconut, optional
Equipment
- 9×13" baking pan
Instructions
- Preheat oven to 350 degrees F.
- Mix dry ingredients (mochiko, sugar, salt, baking powder).
- Add in wet ingredients (coconut milk, evaporated milk, melted butter, eggs, extract) and mix until well combined. Make sure to scrape down the sides of the bowl to check for any lumps of mochiko that did not get incorporated into the batter.
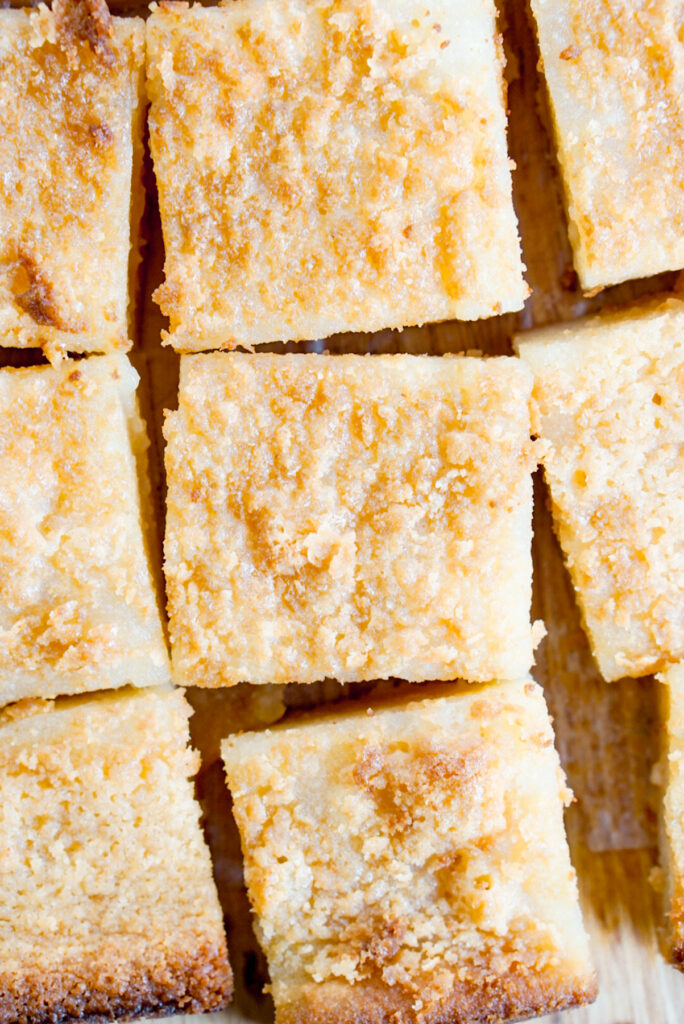
- Pour into a greased 9×13" baking pan, sprinkle shredded coconut on top (if using), and bake for an hour, or until a golden brown crust has formed on top and the middle is set. If using a metal baking pan, start checking for doneness around the 45 minute mark.
- Let cool, slice into rectangles, and enjoy! Leftovers can keep in an airtight container at room temperature.
I love Butter Mochi, so when I tried your recipe, I loved it. I will definitely be making this again. Thank you so much for sharing this recipe with us. The Coconut flakes gave it that crunch which me and my family love.
So glad you liked it! Thanks for leaving a comment!
I’ve made butter mochi numerous times but I tried your recipe for the first time. It’s the best one I’ve ever made.
The other recipes used 4 eggs and less baking powder, so I was nervous of the outcome, but the texture was even better and the coconut on top made a huge difference!
Looking forward to making this again!
I was worried the world didn’t need another butter mochi recipe on the internet, but I’m glad to be proven wrong!
Pingback: The Best Chocolate Butter Mochi - Mochi Mommy
Pingback: The Best Ube Butter Mochi - Mochi Mommy
I have never made butter mochi before. I am gluten free/sugar free due to a health condition, and I miss sweets. Mochiko flour is naturally GF and I substituted the sugar in the recipe for 2 cups of Stevia. The taste is amazing, rich and coconutty. I looked at some other recipes online which had more 5 star reviews, but ended up going with this one because I saw this had evaporated milk, which I thought would make the cake taste much more rich. I am so happy with this recipe, I don’t think I’ll ever try another one!
Thank you, Kristen! 🙂
Ah, thanks so much for taking the time to leave a comment! I’m so glad the recipe worked with the Stevia.
Pingback: Super Easy Chocolate Haupia Pie Recipe - Mochi Mommy
I can’t wait to try this recipe! Instead of sugar, can I use honey or maple syrup?
Hi, I haven’t done that myself, but my guess is that it would still be okay.
Hi Kristen, thanks for sharing this fabulous recipe! Adding the coconut on top takes things to another level — lovely caramelized flavor and a great bit of texture. I had made butter mochi before and thought it wasn’t my thing, but now I’ve thought again. 🙂
Everyone loved it! It makes at least 24 servings though! Could easily halve the recipe.
If I wanted to use the sweeten condensed milk, which of the milks would it be a substitute for in the recipe?
I recommend subbing it for the evaporated milk.
Is it really 1 Tablespoon of baking powder? OR 1 teaspoon?
thanks
Yes, 1 tbsp!
I usually use Whole Milk but how’s the consistency and taste with Evaporated Milk?
Hi, Rose. Evaporated milk has a richer, creamier taste than whole milk, but the texture is the same.
Can I substitute the coconut milk with anything else?
Hi Aimee, if you want to avoid coconut milk in butter mochi, you can look up my custard mochi or everyday butter mochi recipes, which use whole milk.
Pingback: Vanilla Bean Creme Brulee Butter Mochi - Mochi Mommy
Reminds me of the butter mochi I’d get from farmers/little markets growing up. We’d visit the islands every to every other year and was a fav of mine.
I tried your recipe and followed the ingredients and instructions as is but the top of my mochi burnt before the center was able to set fully. Why is this? What could I have done wrong?
Hi, I have gotten this question from some people who found out that if they used glass or disposable baking tins, it didn’t cook through the center. However, a couple other issues could be not mixing the batter well, which causes some liquid to separate and will make the mochi look not cooked even when it is OR it could just be the placement of the baking rack depending on the heat source in your oven. If you figure it out, let me know!
Pingback: Japanese Sweet Potato Butter Mochi (Mochi Cake) - Mochi Mommy
Pingback: Mochi Cornbread Recipe (Easy and Gluten-Free!) - Mochi Mommy
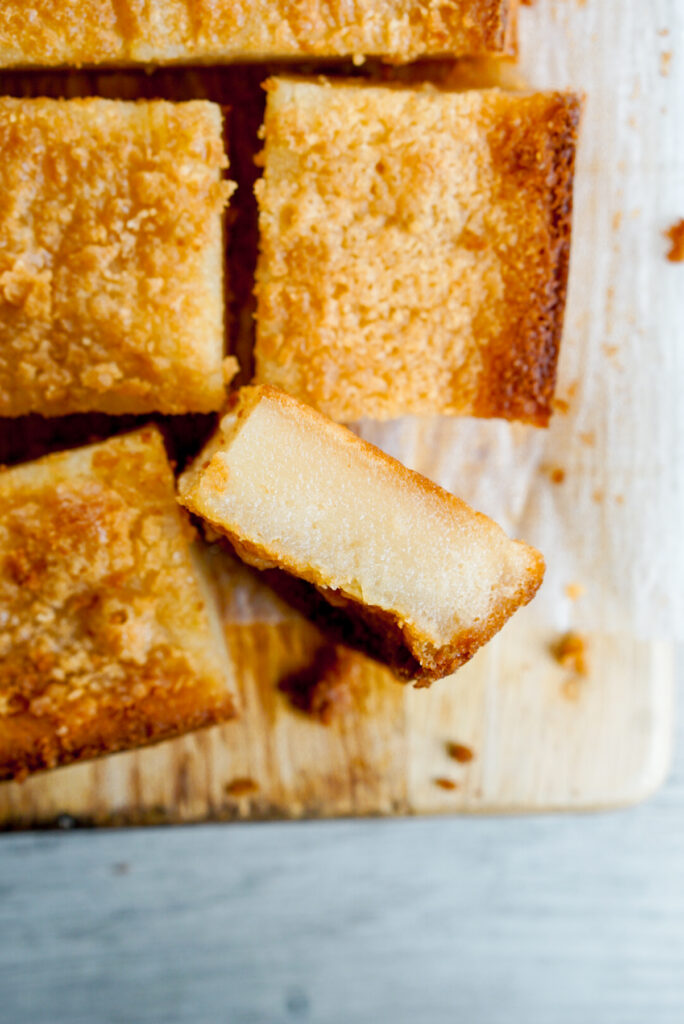
I’ve made this twice and both times that top layer of the butter mochi has a custardy consistency that is different from the gooey, mochi texture of the rest of the cake. I baked it longer the second time (the sides were already quite brown) and the same thing happened. Still delicious! But I was just wondering if the custardy top layer is normal.
Hi Diane! That custard top happens when the batter isn’t super well mixed together – the mochiko will sink to the bottom of the pan. If you’ve been mixing by hand, try using an electric mixer or make sure you stir very very vigorously!
I loved mochi cake when I tried it out today and wanted to make it immediately.
Does the coconut milk make it taste too much coconutty?
Also should we add a layer of sugar at the bottom to make it taste good?
You can’t really taste a strong coconut flavor. Most butter mochi recipes use coconut milk, but you can certainly still achieve a mochi cake without it if you really want to make a substitution. I would not add a layer of sugar in case it burns.
Pingback: Flaky and Buttery Maui Manju Recipe (With Recipe Hacks) - Mochi Mommy
Will be trying this recipe as written for a potluck this weekend, thank you! Curious about the coconut, have you ever added the coconut on top *after* baking, then used a culinary torch to brown it?
Hi Matthew! If you add the coconut after baking it’ll fall off when you try to eat it!
Thank you for the prompt reply, I followed the recipe almost exactly but doubled everything for two 9×13 Pyrex dishes. It came out amazing, probably the best butter mochi I’ve ever had, and both dishes did not last long at the potluck! Many attendees commented the same, and trust me when I say they know their stuff when it comes to butter mochi. I’ll be trying the Ube variation you have at some point, but sourcing quality extract/jam will be a challenge both in availability and pricing…😅 Mahalo nui loa!
If you like the crusty exterior bake it in muffin tins. All the pieces have a crusty exterior! Shorter baking time of course!
My husband and I were invited to a Tropical Luau themed church supper so I looked for recipes authentically Hawaiian. I came across your recipe for Butter Mochi and was very intrigued; never had it before. I made this recipe for the event and could hardly wait for the mochi to cool enough to try it. It was so delicious! I made half topped with shredded coconut and really enjoyed that addition. Everyone at the event enjoyed the mochi and were so intrigued by the history of this confection. Thank you for sharing it, Kristen!
So glad to hear it was a hit!
Literally the BEST butter mochi recipe i’ve ever tried. you are a genius. thank you. <3
Omg, everyone raved about this recipe. It was all gone in a instant
Served it at local Asian American film festival
Asian American film festival sounds amazing! I’m so glad to hear the butter mochi was well loved.
Do you use sweetened or unsweetened shredded coconut? My guess is that unsweetened would be easier to sprinkle on top. Excited to try this recipe!
I’ve used both and they both are fine! It’s kind of up to your tastes how much extra sweetness you like.
Made this great Hawaiian Butter Mochi, “onolicious!” Born and raised on Oahu, 1st generation Pilipino 🤙🏽. The mochi hit home and my family thoroughly enjoyed it. Mahalo for the recipe, I added sesame seeds along with the coconut flakes ☺️. Next try is the Ube butter mochi
Thanks so much for leaving a comment! I hope you like the ube one too!
My niece liked it and requested me to make it again. This time, I may add the shredded coconut. Should I use sweetened or unsweetened?
Either works! Just depends on your preference.
Hi! I made your pumpkin mochi and it was fabulous. I accidentally ended up with a tad less butter but it came out very spongey – cake like!
How would I get the same cake like texture for this recipe, you think?
Hi Anna, I’m not entirely sure I would be able to replicate the pumpkin mochi exactly with this recipe, since there’s significant differences in the ingredients. My advice would be to try this recipe as is, and if you prefer the pumpkin you can always go back to that one again.
Love this recipe! Tried it and it was the best and so Ono! How long can it store in the airtight container at room temp for? I’m making for a family member the night before for her to take to a church gathering the next day. Mahalo!
Yay! If you have a hot and humid kitchen, I recommend putting it in the fridge and then reheating in the microwave before serving. If your kitchen is nice and cool, it can definitely be at room temperature for one day or more. I usually don’t keep mine out more than three days since my kitchen gets humid.
Aloha, thank you for having this recipe available!! When my Mom passed we found so many of the Mochiko Blue Star Boxes in her pantry. Talking to my sister on Oahu yesterday about the dishes we missed from Mom, and my sister mentioned how she misses her Coconut Butter Mochi.? I never really ate it, but she remembered each time Mom made it. Now I hope I can make it now for my younger sister who’s craving it all over again.. Mahalo and thank you very much..
I made this and the center was fluffy and cake like, but the outsides were dense. Any ideas why? I would like a cake texture throughout. I was using a glass pan. Based on one comment maybe reducing the butter?
Hi Xandre, a couple of guesses: it’s possible the batter just needed to be mixed more before baking OR it could have been the glass pan. I always recommend using metal for butter mochi for better heat conduction.
Do you have a recommendation on whether I should use full fat coconut milk or a lower fat one? I am scared that it will be too greasy after its done baking.
Always full fat unless otherwise specified
Hi, super excited to try your recipe. I’m craving home. 🙂 Curious, how do you think coconut condensed milk would do as a sub for the dairy condensed milk in this recipe?
I haven’t done it myself, but I think it should still bake up fine. It may be more heavy on the coconut flavor, but as long as you’re okay with that, I’d say it’s a reasonable substitution. Good luck! Let me know if it works!
What do you grease the pan with?
You can use any baking spray or canola oil spray.
These seemed to refuse to set up, very flat, felt uncooked even when left in longer…feels like recipe needs less liquid. Followed recipe exactly.
Hi, I see you’re posting from Colorado. I can’t tell exactly what happened without more details, but please remember you need to adjust recipes for altitude.